Items
In the Administration module, items represent the products, services, or inventory that your business manages.This section explains how to add new items, manage their details, and track their history and availability.
Adding a New Item
To add an item, provide the following details:
- Code: A unique identifier for the item (e.g., SKU or product code).
- Currency: Specify the currency used for pricing the item.
- Name: Enter the name of the item.
- Sale Price: Define the selling price for the item.
- Document Name: Add a reference or description for documentation purposes.
- Measure: Specify the unit of measurement (e.g., kilograms, liters).
- Barcode: Assign a scannable code for inventory tracking.
- Print: Enable the option to print labels or barcodes for the item.
Item Details
Manage additional information about the item:
- Weight (Net/Gross): Specify the net and gross weight.
- Category: Assign the item to a category for better organization (e.g., Electronics, Furniture).
- Item Type: Classify the item as Stock or Non-Stock.
- Stock: Manage and monitor stock levels.
- Purchase Price: Record the acquisition cost of the item.
- Group: Group items for easier management (e.g., by department or product type). Categories are added directly from the categories section.
- Attribute Group: Define custom attributes or specifications for the item.
- Related Items: Link related items for cross-selling or upselling purposes.
Chart of Accounts
Set financial accounts associated with the item:
- Acquisition: Account for the item's purchase costs.
- Expense: Record expenses related to the item.
- Expense Distributed: Manage distributed expenses across accounts.
- Revenue: Track revenue generated from item sales.
Additional Features
Enhance item management with these options:
- Is Sale: Mark if the item is available for sale.
- Is Inventory: Indicate whether the item is tracked as inventory.
- Is Batch: Specify if the item requires batch tracking. Batches are added from the batch section.Provide the Batch Name, Code, Item, and Manufacture Date.
- Images: Upload images for Items.
- Description: Provide a detailed description.
- Content Product/Collection: Link to related product or collection content.
- Content Slug: Assign an SEO-friendly URL segment.
- Content Show Stock Count: Enable the display of stock levels on the content page.
- Warranties: Manage warranty details. Warranties can be added from the Warranties section. Provide the Code, Name, and the duration in Months.
- Price List: Define pricing tiers or lists for the item. If a price list has already been added, select it from the dropdown menu. If no price list exists, create a new one and associate it with the item from the price lists section.
Item Profile
Once added, detailed information about an item can be accessed directly from the Items List.
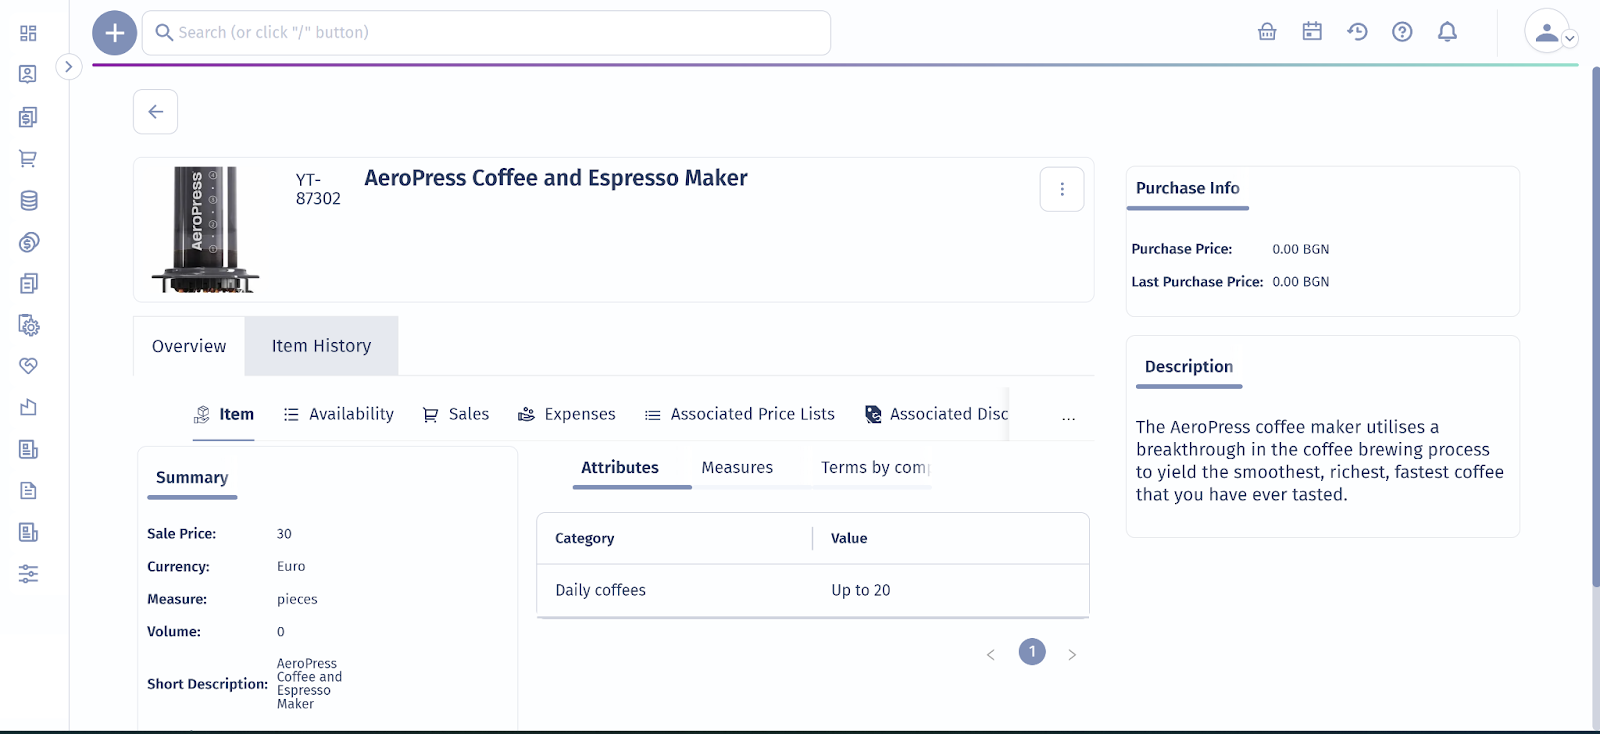
Key sections in the Item Profile include:
- Item History: Displays a log of the item’s movements, such as stock transfers and adjustments, tracked through the Warehouse module.
- Availability: Provides an overview of current stock levels, broken down by quantities, lots, or batches.
- Sales: Lists all sales orders and transactions involving the item.
- Expenses: Shows expense data linked to the item.
- Associated Price Lists: Lists all prices associated with the Item.
- Document Management: Allows uploading and managing files such as images, technical sheets, or warranties related to the item.
Importing Item Data
To simplify item setup, you can import item data in bulk from an external file.
- Navigate to Administration ‣ Data Import.
- Select Items from the available options.
Use the provided Import Template to ensure your data matches the required structure.
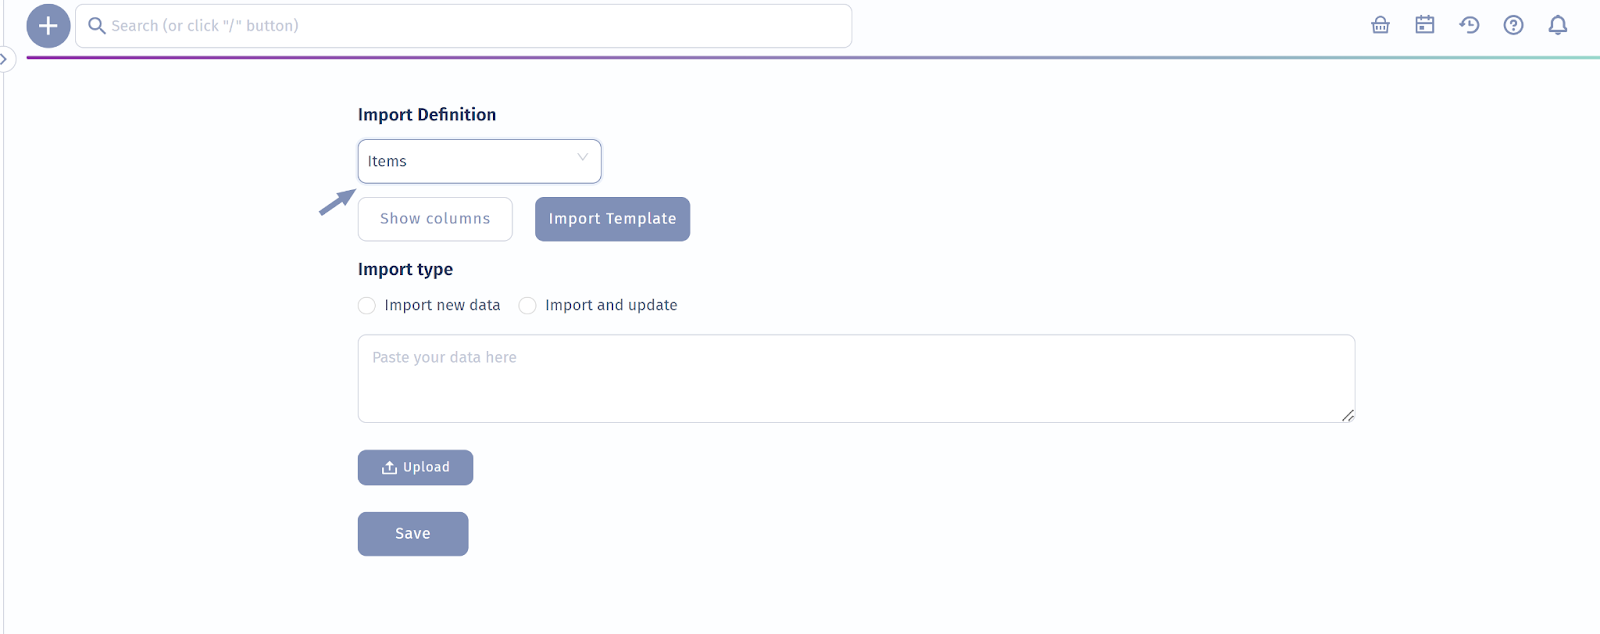
Important: Ensure all columns in your import file align with the system’s data structure to avoid errors and guarantee accurate uploads. Create a copy of the import file and make the necessary changes directly within the copied file.