Company Settings
Before you begin using Composity, it’s essential to configure your company settings to ensure the platform works according to your business needs. Only users with administrative roles can view and modify company details, which will be consistent across all users in the workspace.
Company Details
To update your company details:
- Sign in to Composity with an Admin role.
- Click on your avatar in the bottom left corner of the screen.
From the dropdown menu, select Settings.
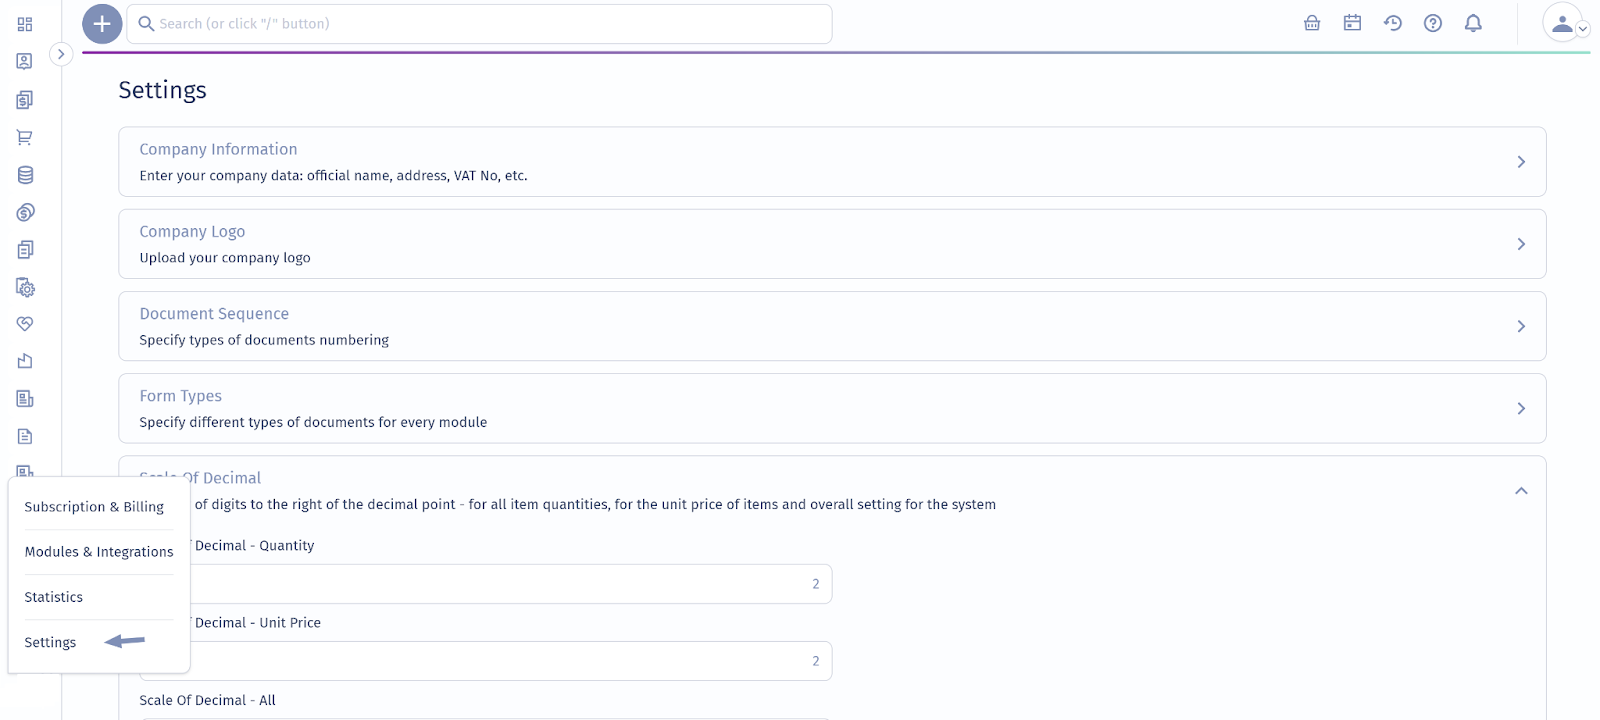
Edit Company Information:
- On the General Settings page, navigate to the Company Information section and click the arrow.
- You will be presented with a form pre-filled with your existing company details. Modify or add the necessary information as required.
Fields to Update:
- Name: Enter your company's trading or legal name as it will appear on all documents.
Example: Composity LTD - Company ID: Specify the unique identification code assigned to your organization.
Example: 1234 - Company VAT: Enter the VAT number assigned to your organization for tax purposes.
Example: 6789 - Responsible Person: Enter the name of the legally designated person responsible for the organization.
Example: New User - City: Enter the city where your organization is based.
Example: Varna - Country: Select the country where your organization operates.
- Post-Code: Specify the postal code of your organization’s location.
- Address Line 1: Enter the primary street address of your organization.
- Address Line 2: Enter a secondary street address if applicable.
Once the necessary details have been updated, click Save to apply the changes.
Company Logo
To update your company logo:
- Navigate to Settings and select Company Logo.
- On the Change Logo page, click the Upload or Browse button to select a new logo file.
- You can either:
- Browse and select an existing logo file from the Documents section.
- Upload a new logo directly from your device by clicking Upload.
Once the logo is uploaded, it will be displayed across the system where your company logo is referenced.
Document Sequence:
Define the numbering system for your documents to ensure consistency and easy tracking.
Create a New Sequence
- Click New to create a new document sequence.
- Provide a descriptive Name for the sequence, such as "Invoice Numbering" or "Sales Order Sequence," to clearly identify its purpose.
Define Sequence Details
- Fill out the following fields to configure the sequence:
- Prefix: Add a string or code that will appear before the numbering (e.g., "INV-" for invoices).
- Record Type: Specify the type of record, like orders, receipts, or invoices.
- Fields to pattern: Specify the first pattern of the sequence (e.g., User or Document #).
- Company: Select from list of options where sequence will be applied
- Suffix: Optionally, add a string or code that appears after the numbering (e.g., "-2024").
- After entering all details, click Save to finalize the sequence.
Decimal Scale Settings
Set the number of decimal places to use for quantities and unit prices across the system. These settings ensure consistency in data entry and display.
- Scale Of Decimal - Quantity: Set the number of decimal places for item quantities.
Example: 2 - Scale Of Decimal - Unit Price: Set the number of decimal places for item unit prices.
Example: 3 - Scale Of Decimal - All: Set the number of decimal places to be used system-wide, including overall calculations.
Example: 2
Discount Method
Choose the discount method for sales lines, determining how discounts are applied in the system.
- Discount Method: Select whether discounts should be applied as a percentage, a fixed amount, or as a combination of both.
Period Settings
Control the ability to create, edit, and delete documents within specific timeframes.
- Open Period Before: Specify the maximum period before today that users are allowed to create, edit, or delete documents.
- Open Period After: Specify the maximum period after today that users are allowed to create, edit, or delete documents.
Date Format
Customize the date format used throughout the system. The default format is day.month.year, but you can adjust it to match your preferred format (e.g., month/day/year).