Projects and Tasks
The Projects and Tasks module allows for efficient management of projects, from initial planning to completion. This includes creating projects, defining stages, assigning tasks, tracking progress, and logging time. These features ensure teams stay organized, meet deadlines, and manage all aspects of a project effectively.
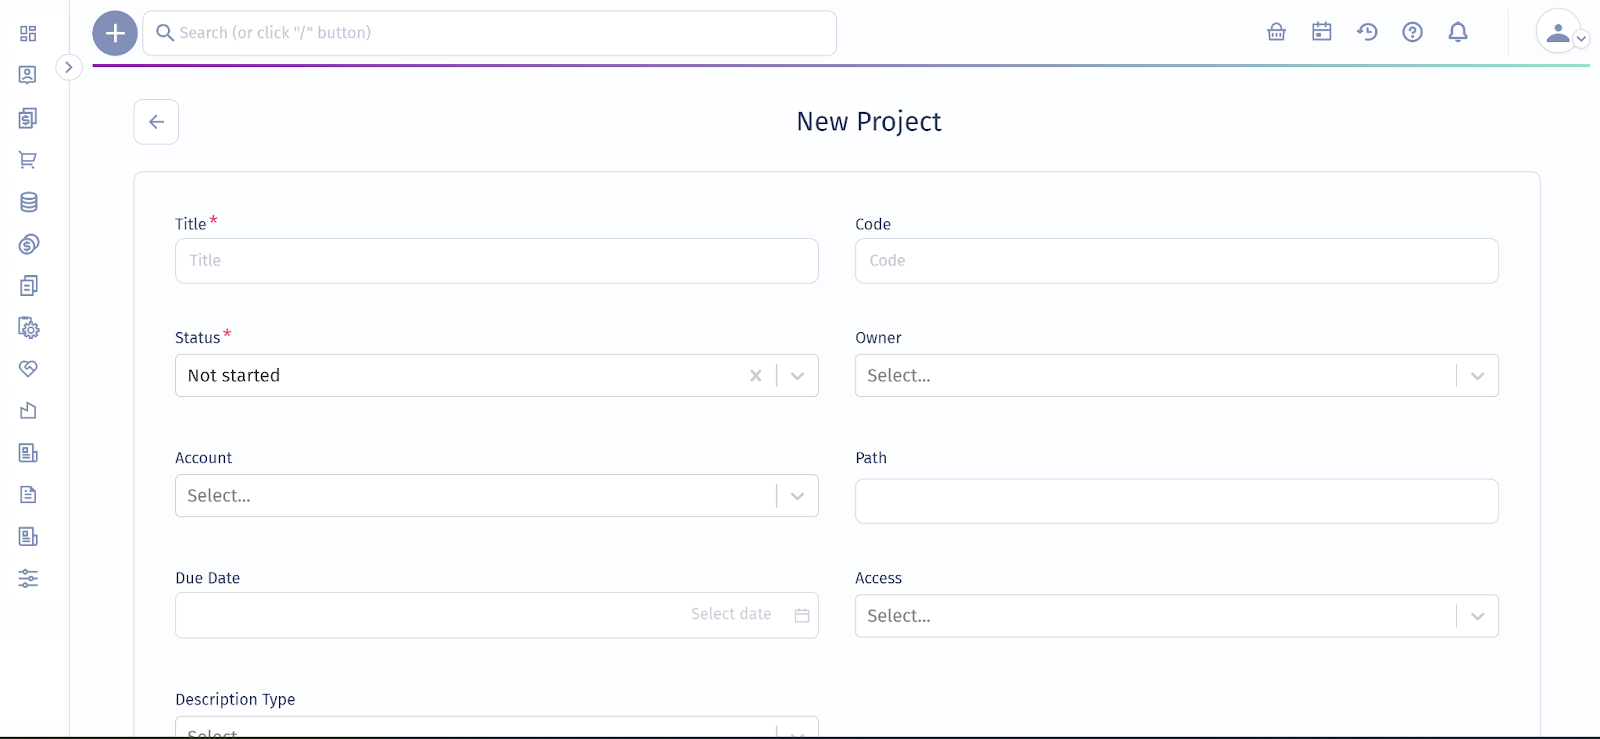
Creating a New Project
Steps to Create a Project:
- Click New to begin creating a project.
Fill Out Project Details:
- Title: Enter a descriptive title for the project. (Required)
- Code: Assign a unique identifier or code.
- Status: Choose a status, such as Active.
- Owner: Select the project owner from the user list.
- Path: Define the hierarchical path if applicable.
- Start Date: Specify the start date.
- End Date: Set the projected end date.
- Due Date: Add specific due dates if needed.
- Access: Select the access level, such as Public.
- Description Type: Choose the description format, typically HTML.
- Description: Provide a detailed description, outlining the project’s goals, scope, and deliverables.
- Click Save to create the project.
After creation, the project profile provides detailed information, including tasks, sales, deals, and expenses. Relevant documents can also be attached directly to the project.

Project Profile
The project profile allows you to efficiently manage and monitor project progress. From this section, you can add tasks related to the project by navigating to the Tasks tab and clicking + icon. You can also associate sales, offers, and documents directly with the project.
Note: In the Documents section, you can upload files, mark them as private or public, or add links for quick access.
Activities
Tracking activities is essential for effective project management. Composity makes it easy to add and manage activities for your project. To add or update activities, navigate to the Activity tab and click + icon. From there, select the type of activity you want to include for the project.
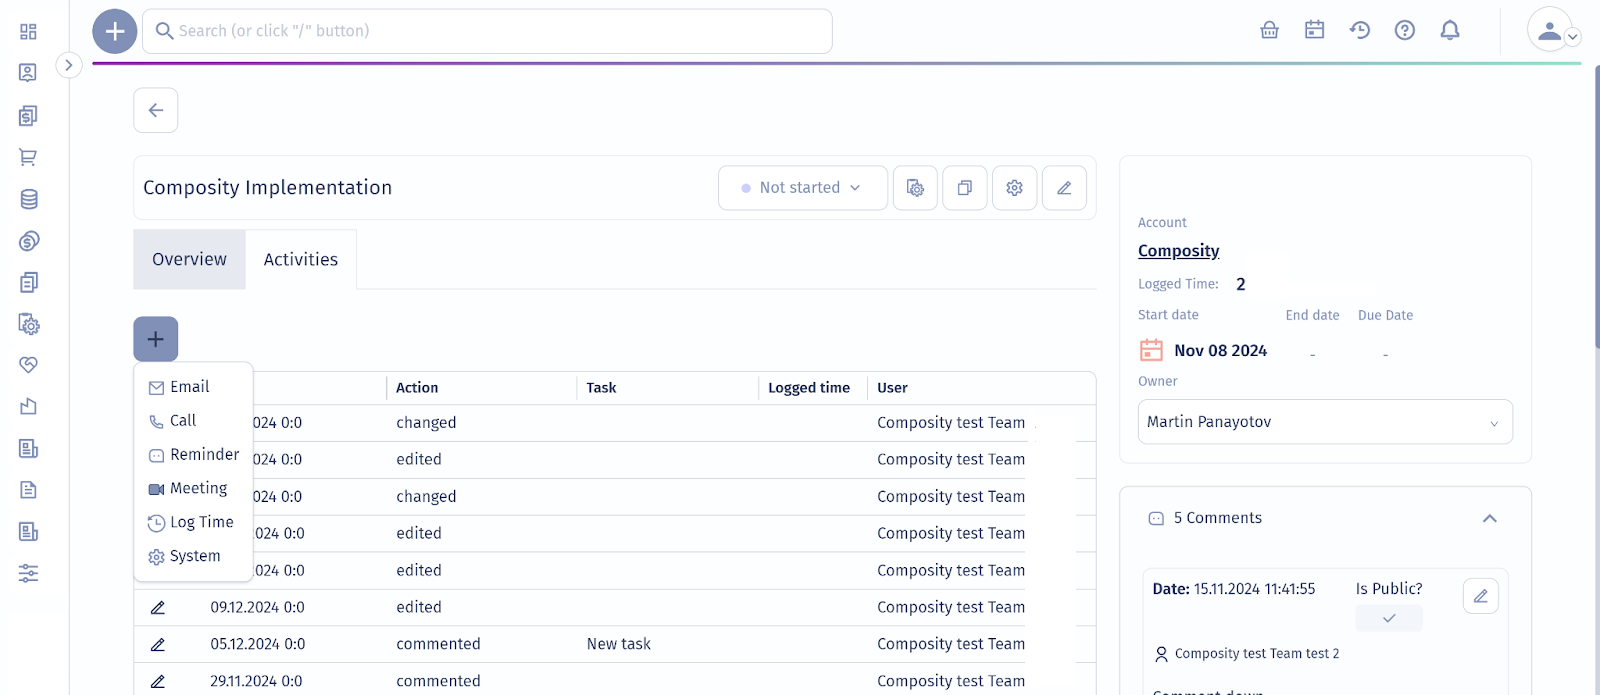
The project profile in Composity includes a public profile link, enabling you to organize tasks into sections by adding tickets directly to the project.
Through this link, you can:
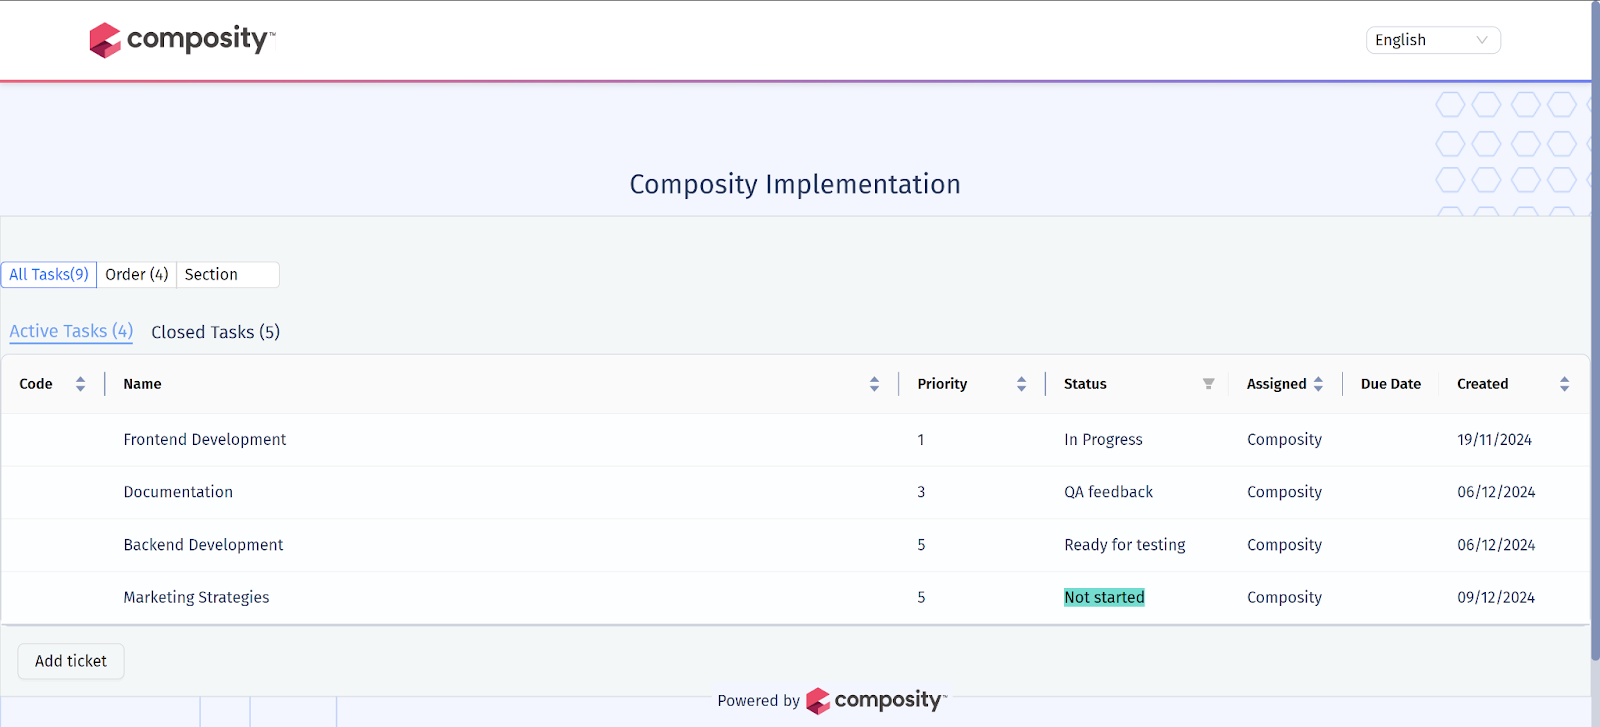
- View task details, including relevant information and progress.
- Update the task status by selecting Close Task when completed.
- Attach all related documents for easy access and reference.
Note: Sections for the project are configured under Project Profile ‣ Settings ‣Sections, allowing you to define and structure how project information is categorized.
Creating and Managing Tasks
Steps to Create a Task:
- Navigate to the Task Board within the project.
- Click New to create a task.
- Fill Out Task Details:
- Title: Provide a descriptive title. (Required)
- Is Chargeable?: Specify if the task is billable.
- Completion: Indicate the completion percentage.
- Priority: Assign a priority level, such as High.
- Access: Define the access level, such as Public.
- Section: Specify the project section related to the task.
- Project: Link the task to a specific project.
- User: Assign the task to a user.
- Account: Associate with an account if applicable.
- Board: Link to the relevant task board. (To create a project or task board, navigate to the Boards section in the module and add a new Board.)
- Sale: Connect the task to a sales opportunity if needed.
- Parent Task: Define any parent tasks for sub-tasks.
- Start Date, End Date, Due Date: Set these as needed.
- Images: Upload related images or files.
- Description Type: Select the format, typically HTML.
- Description: Provide detailed objectives and requirements.
- Click Save to finalize the task.
Logging Time for Projects and Tasks
Steps to Log Time:
- Navigate to the Logged Time section.
- Click New to create a time log entry.
- Fill Out Time Log Details:
- Project: Select the associated project.
- Is Chargeable?: Indicate if the time is billable.
- Task: Link the time log to a task.
- Type: Specify the work type performed.
- Date: Enter the work date.
- Log Time: Specify the time spent on the task.
- Click Save to record the log.
Customizing Forms
Project and task forms can be tailored to suit organizational needs.
Steps to Customize Forms:
- Navigate to: Settings ‣ Form Types ‣ New Project or Task.
- Customize Fields: Adjust fields and layouts as needed.
To add fields not available in the default form, follow these steps:
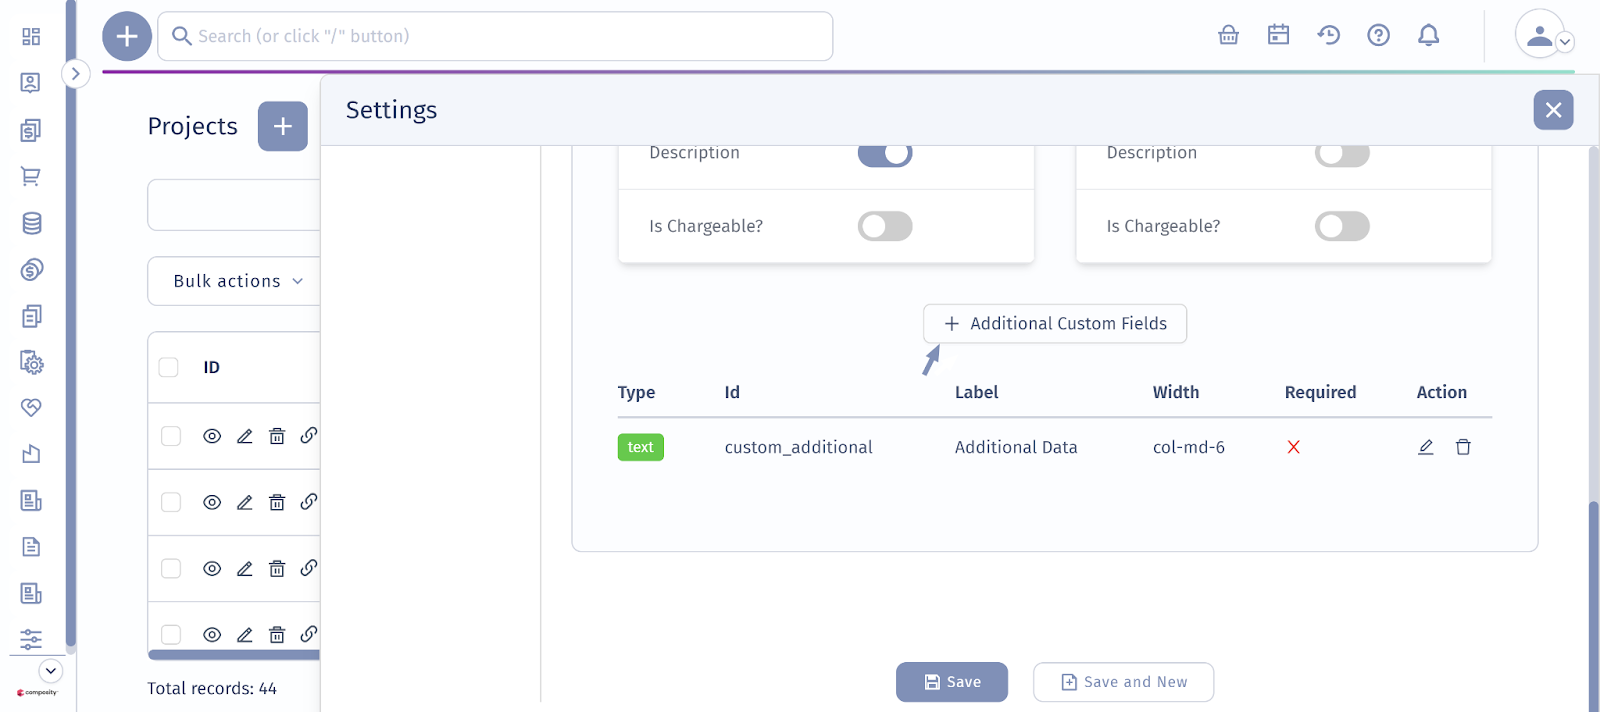
- Access Additional Custom Fields:
Click on Additional Custom Fields to add new types of content. - Choose the Content Type:
Select one of the following types for your new field:- Text (Small or Long): Use for titles, descriptions, or other textual information.
- Number: For numerical data, such as integers, decimals, or floating-point numbers.
- Date/Time: A date picker that includes hours, minutes, and seconds.
- Markdown: A special markdown editor for fast and easy web writing.
- Images: An image uploader for adding visuals.
- Switch: A boolean field type, allowing values such as Yes/No, 1/0, or True/False.
- Dropdown: Enables customers to select from multiple predefined options.
- Fill Out the Field Form:
Complete the form for the chosen field type by specifying its properties and values. - After completing the form, click Save.
These custom fields will then become visible and available for use when adding new forms.